Create Ebooks using yWriter and Calibre
A how-to guide based on my own experience
Calibre is a freeware/open source ebook reader and compiler. It will convert between many formats, but I got the best results when I exported my novel to html and used that as the input file.
The problem is, most word processors pack a huge amount of hidden code into a simple html file, and all this cruft can lead to odd-looking formatting when you convert the files to ebooks. yWriter does have an HTML export, but it's designed to display or print your work, not export to ebook.
So, yWriter has an 'Export to Ebook' feature. This routine will export your novel to an html file which is optimised for conversion using Calibre. The resulting ebook should be formatted correctly without any nasty surprises.
Step one is to click Project - Export - Export to Ebook from the yWriter main screen.
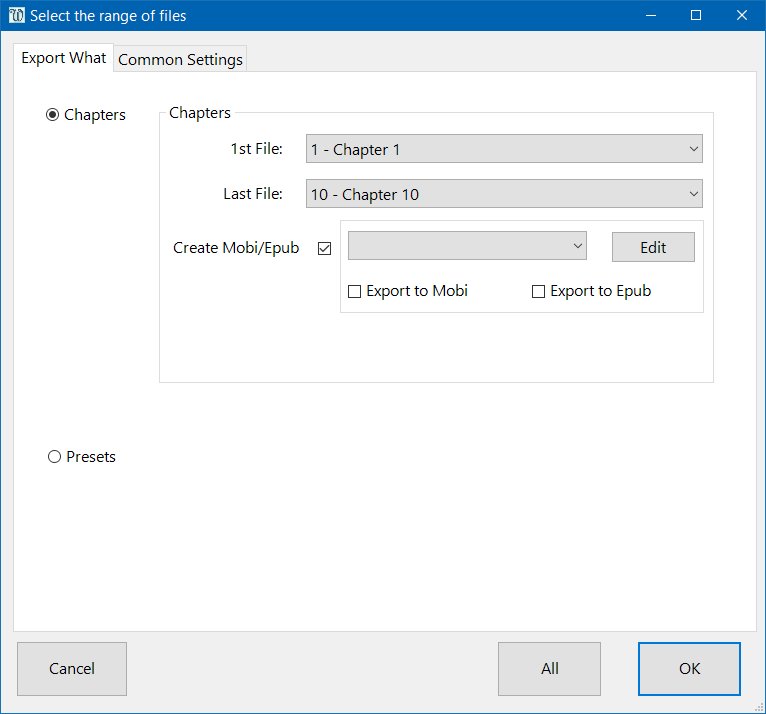
On this screen you can pick the first and last chapter to export, and below that you can decide whether to export to Mobi, Epub, or both. However, the drop-down is empty, and so we need to click Edit to set up an exporter template.
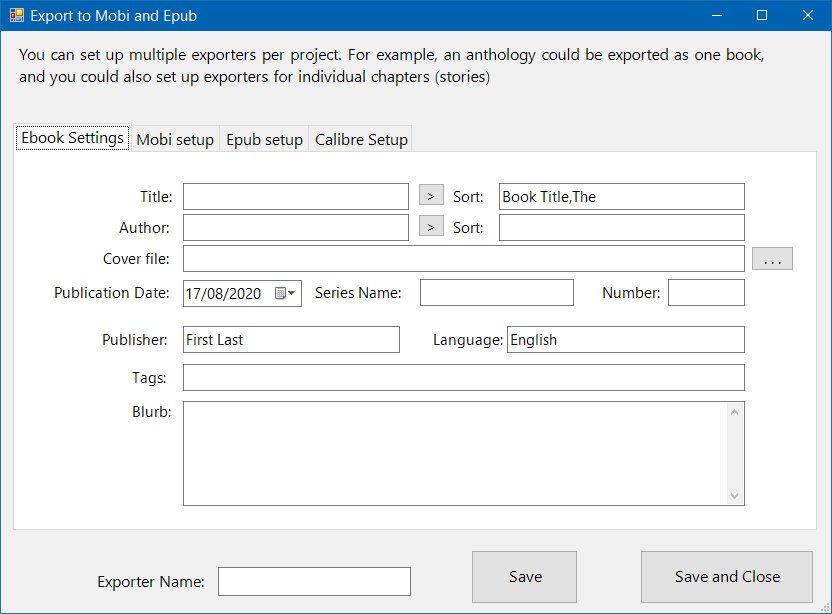
This is the first tab of the exporter template. Normally you won't need to touch the Mobi Setup and Epub Setup tabs. The Calibre Setup tab is mentioned below.
Fill out the details for this particular project, using the following screenshot as a guide.
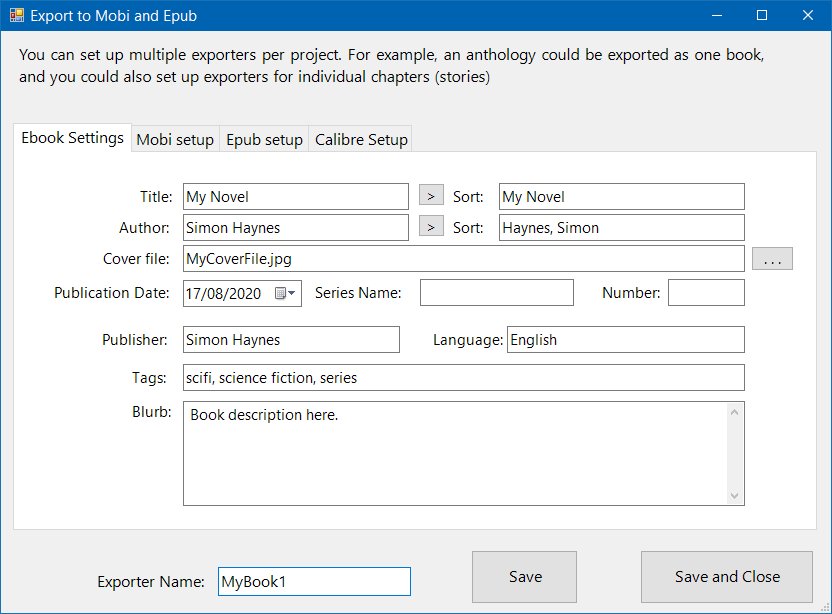
Note about the cover file: if the file is sitting in your project folder you don't need to specify the full path. If it's somewhere else on your computer, you do.
With the description, I avoid entering linebreaks, as I don't know whether they're supported by other program that might read this information.
Before you click save, give the exporter a name. If you change this name and click save, you'll create a new exporter. Exporters live inside the YBEBK folder, inside your yWriter project folder. You can edit them with a text editor, or delete them, or rename them.
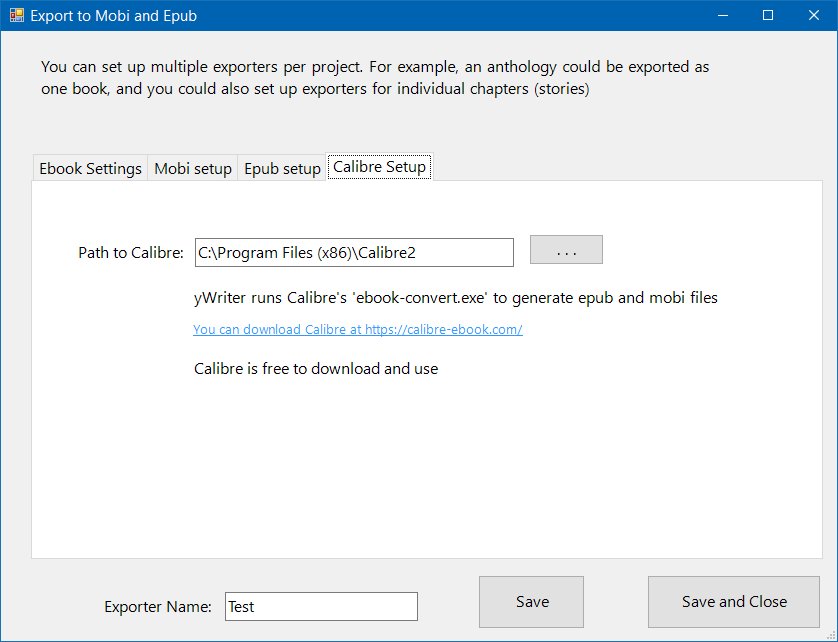
This is the Calibre setup screen. You only have to do this once on each computer yWriter is installed on. Tell yWriter where to find the Calibre install folder, so that it can run ebook-convert.exe when needed.
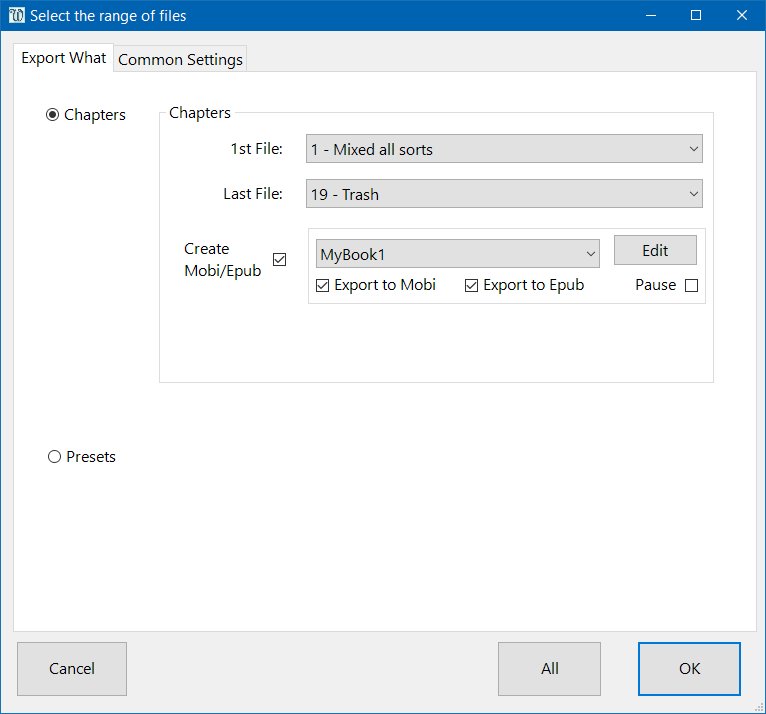
Now we return to the export screen, where you can see the export template name in the dropdown. If you create more than one exporter they will all appear in this list. If you save multiple yWriter projects into one folder, the exporters for all the projects will show here. Click OK to export to epub and mobi, as selected.
Note: a command window will appear, once for epub and once for mobi, and you'll see Calibre working away. If the window appears and then immediately disappears, it's almost certainly due to a missing cover file.
To diagnose any problems, tick the Pause option, and the command windows will await a keypress before closing. That will give you a chance to read any error messages.
In the following example, you can see that Calibre is complaining about a missing cover file.

Your ebook(s) will be saved to the Export folder, inside your project folder. If you want them to save elsewhere, you can change this yWriter setting under Settings - yWriter Settings:

To summarise, you can create ebooks like this:
yWriter5 > Calibre > Ebook Reader
Or like this:
Word/OpenOffice > yWriter > Calibre > Ebook Reader
You might like to see my
article on publishing ebooks.
